


How to Set Up a Graphic Tablet on Windows and Mac
- In most cases, setting up an XPPen graphic tablet on Windows 11 or macOS takes less than 10 minutes when the correct installation steps are followed.
- Always download drivers from the official XPPen support page, not from the disc included in the box, which is often several versions out of date.
- On macOS Ventura, Sonoma, Sequoia, and later, Accessibility and Security permissions must be enabled manually for pen input to work correctly in creative applications.
- If pressure sensitivity is not detected in Photoshop CC 2022 and later, enabling Windows Ink in the XPPen driver usually resolves the issue.
- Based on support experience, many “tablet not working” issues can be fixed through a complete driver uninstall and clean reinstall without any hardware fault.
- Express keys, shortcut buttons, and pressure curves are configured through the XPPen driver software and can significantly improve workflow and productivity.
- What You Need Before You Start
- How Driver Software Works with Your Tablet
- Compatible Models and System Requirements
- Step-by-Step Setup on Windows 10 and 11
- Step-by-Step Setup on macOS
- Configuring Your Tablet for Your Workflow
- Common Problems and How to Fix Them
- Setting Up for Photoshop, Krita, and Illustrator
- Advanced Configuration Tips
- Who Needs a Graphic Tablet Setup Guide?
- Related Reading
- Frequently Asked Questions
Getting your graphic tablet to work properly for the first time should be a quick and straightforward process, yet many artists and designers spend hours troubleshooting avoidable issues. In most cases, setup problems are caused by installing outdated drivers, skipping important system permissions, or missing a restart during installation.
This guide walks you through the correct setup process for XPPen graphic tablet on both Windows and macOS, helping you avoid the most common installation problems from the start.
Whether you have just purchased an XPPen Deco 01 V3 or an Artist 13 pen display, the setup process follows the same core sequence. The XPPen India team has compiled this guide based on the most common support queries from Indian users, with specific attention to the issues that arise on Windows 11 22H2 and later and macOS Ventura, Sonoma and Sequoia.
Last reviewed: May 2026
1. What You Need Before You Start
Before connecting your XPPen tablet, make sure you have the following:
- Your XPPen tablet and the included USB cable (or wireless receiver, if applicable)
- A computer running Windows 10, Windows 11, or macOS Catalina (10.15) and later
- A stable internet connection to download the latest driver
- Administrator access on your computer
- Any previously installed tablet drivers from brands like Wacom or Huion removed completely
If you have previously installed a Wacom, Huion, or another drawing tablet driver on your computer, it is recommended to uninstall it completely before installing the XPPen driver. Driver conflicts are one of the most common causes of tablet installation issues and pressure sensitivity problems.
2. How Driver Software Works with Your Tablet
Unlike a standard keyboard or mouse, a graphic tablet requires dedicated driver software to function correctly. The tablet continuously sends input data such as pen position, pressure sensitivity, tilt information, and shortcut button commands to the computer. The driver translates this data into inputs that creative software like Photoshop, Illustrator, Blender, and Clip Studio Paint can recognise properly.
The XPPen driver also gives users access to important settings such as:
- Pressure sensitivity adjustment
- Express key customisation
- Display mapping
- Multi-monitor setup
- Pen button configuration
- Active area control
Because of this, keeping your driver updated is important for both compatibility and performance. Newer driver versions often include fixes for operating system updates, application compatibility issues, cursor lag, pressure sensitivity bugs, and overall stability improvements.
Driver update importance: According to driver release notes published on the global XPPen website, major driver updates typically address OS compatibility, application-specific input bugs, and performance improvements for brush response latency. Using the latest XPPen driver can help ensure smoother performance and reduce common setup problems, especially on newer versions of Windows and macOS.
3. Compatible Models and System Requirements
| Operating System | Minimum Version Supported | Notes |
|---|---|---|
| Windows | Windows 10 (Version 1903) | Windows 11 fully supported; enabling Windows Ink may help resolve Photoshop pressure sensitivity issues |
| macOS | macOS 10.15 Catalina | Ventura, Sonoma and Sequoia require additional privacy permission steps |
| Android | Android 6.0 (model-dependent) | Compatible devices require USB OTG or USB-C support |
| Linux | Kernel 4.15+ (basic) | Linux support is community-maintained; not officially supported by XPPen India |
| Chrome OS | Chrome OS 88+ | Feature availability may vary by device and application |
4. Step-by-Step Setup on Windows 10 and 11
Step 1: Download the Driver
Open a browser and go to XPPen India support. Search for your exact model name or scroll to find it in the product list. Click the Windows driver download link. Do not use the disc that came in the box.
Step 2: Uninstall Any Previous Tablet Drivers
Open Windows Settings, go to Apps, and search for any existing tablet drivers. If you find a previous XPPen driver or any driver from another brand, use its uninstaller to remove it completely. Restart your computer after uninstalling.
Step 3: Run the Installer
Right-click the downloaded driver file and select Run as Administrator. Follow the on-screen installation wizard. Accept any UAC (User Account Control) prompts. It is recommended to keep the tablet disconnected until installation is complete.
Step 4: Restart Your Computer
When the installer completes, restart your computer. This step is not optional. The driver registers its system services during the restart, and skipping this step is the leading cause of "tablet not detected" reports.
Step 5: Connect the Tablet
After restarting, connect the tablet directly to a USB port on your computer (not through a hub or extension cable). The XPPen driver icon will appear in the Windows system tray, confirming the tablet is recognised.
Step 6: Verify Pen Input
Open the driver tray application and navigate to the Pen Settings tab. Hover the pen over the tablet surface without pressing down. The cursor should move on screen. Press lightly and then firmly to confirm the pressure bar in the driver responds smoothly to different pressure levels.
If you use a laptop with a built-in touchscreen or stylus, Windows may have a Microsoft built-in tablet driver active. Go to Device Manager, expand Human Interface Devices or Pen and Touch, and disable any Microsoft-branded pen input devices while using your XPPen tablet to avoid conflicts.
5. Step-by-Step Setup on macOS
Step 1: Download the macOS Driver
Visit XPPen India support and download the macOS driver package for your model. The file will be a .pkg installer.
Step 2: Open System Settings Before Installing
On macOS Ventura, Sonoma, and Sequoia, navigate to System Settings, then Privacy and Security, and temporarily allow apps from identified developers. This pre-step prevents the installer from being silently blocked by Gatekeeper.
Step 3: Run the Installer
Double-click the .pkg file and follow the installation prompts. When the installer requests permissions, grant Full Disk Access and Accessibility in the Privacy and Security pane. These are required for the driver to intercept pen input and route it to your applications.
Step 4: Approve Security Extension
On macOS Ventura and later, a notification will appear asking you to allow a new system extension in Privacy and Security, Security tab. Click Allow and enter your administrator password. Without this step, the driver installs but does not function.
Step 5: Restart Your Mac
Restart completely. On Apple Silicon Macs (M1, M2, M3, M4 chips), the driver runs as a Rosetta process. Performance is normal, but confirm Rosetta is installed under System Settings if you see an error during first launch.
Step 6: Connect and Verify
Connect your tablet. The XPPen driver icon will appear in the macOS menu bar. Open the driver and test pen movement and pressure in the verification area. Then open Krita or your drawing application of choice and confirm pressure-sensitive brush strokes work correctly.
6. Configuring Your Tablet for Your Workflow
Active Area Mapping
Open the XPPen driver and go to the Working Area tab. By default, the full tablet active area maps to your entire monitor or all monitors combined. If you use a dual-monitor setup, map the tablet to your primary monitor only to improve cursor accuracy and reduce wrist travel distance.
Express Key Configuration
Navigate to the Keys section of the driver. Each physical express key on your tablet can be assigned a keyboard shortcut, mouse button, or software command. Recommended starting assignments for Photoshop: Ctrl+Z (undo), Ctrl+Alt+Z (step history), [ (decrease brush size), ] (increase brush size), and Ctrl+S (save).
Pressure Curve Adjustment
In the Pen section of the driver, you will find a pressure curve graph. The diagonal line represents the relationship between physical force and digital output. Drag the midpoint of the curve down to create a softer response, useful for fine inking. Drag it up for a firmer response, better for bold illustration work.
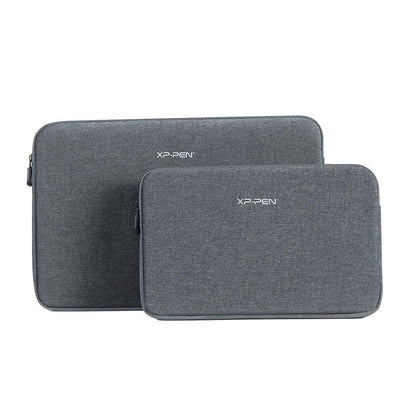
Upgrade Your Setup with XPPen Accessories
XPPen accessories such as drawing gloves, replacement nibs, and adjustable stands can help improve comfort during long drawing sessions. All accessories ship with fast India delivery.
Shop Accessories7. Common Problems and How to Fix Them
Tablet Not Detected
Connect the tablet directly to a computer USB port, not a hub. Try a different cable. Confirm the driver service is running by checking the driver icon in the system tray or menu bar. If the icon is absent, the driver did not install correctly: uninstall, restart, and reinstall.
Pen Has No Pressure Sensitivity
On Windows with Photoshop: confirm Windows Ink is enabled in the driver pen settings. On macOS with any app: confirm Accessibility permission was granted and the security extension was approved. Restart the application after confirming driver settings.
Cursor Jumps or Lags
Move the tablet away from electromagnetic sources: speakers, wireless chargers, and USB 3.0 hubs are common culprits in Indian apartment setups where desks are compact. If the issue only occurs near one area of the tablet surface, the coil grid in that zone may have interference from a nearby object.
Pen Tip Registers Too High Above the Surface
This is a hover height calibration issue. In the driver's pen settings, reduce the pen hover height to the lowest setting. If the problem persists, recalibrate the tablet using the calibration tool in the driver's About or Tools section.
In India, power supply fluctuations can occasionally cause USB devices to disconnect momentarily. If your tablet randomly loses connection during use, try connecting it to a UPS-backed power strip and use a short, direct USB cable. Extension cables over one metre can cause data integrity issues with USB HID devices.
8. Setting Up for Photoshop, Krita, and Illustrator
Adobe Photoshop CC (2022 and Later)
After installing the driver, open Photoshop and select any pressure-sensitive brush. Go to Edit, Preferences, Technology Previews, and ensure Disable Native Canvas is unchecked. In the XPPen driver, go to Pen Settings and enable Windows Ink (Windows only). Create a test document and draw a stroke: the line should vary in thickness with pen pressure.
Krita
Krita is one of the best-supported applications for XPPen tablets. On Windows, Krita works with both Windows Ink and Wintab input modes. Go to Settings, Configure Krita, Tablet Settings, and confirm the Tablet Input API matches what your driver outputs. On macOS, Krita detects the XPPen driver automatically. No special configuration is required beyond the standard driver setup.
Adobe Illustrator
Illustrator uses a different pressure pipeline than Photoshop. Enable Windows Ink in the driver, then in Illustrator go to Edit, Preferences, General and ensure Use Preview Bounds is checked. Create a calligraphic brush stroke to verify pressure sensitivity is active. Illustrator's pencil tool and width tool both respond to pen pressure with correct driver configuration.
Compatibility note: Research by Adobe's developer team confirms that Photoshop CC 2022 onwards uses a Windows Ink WM_POINTER API by default on Windows, superseding the older Wintab protocol. XPPen's driver supports both, but you must manually select Windows Ink in the driver for the new Photoshop path to function correctly.
9. Advanced Configuration Tips
Application-Specific Profiles
The XPPen driver supports per-application profiles, meaning your express keys can have different assignments in Photoshop versus Krita versus Zoom. Open the driver, click the Add Application button, browse to the application executable, and set custom key assignments for that profile. The driver automatically switches profiles when you bring each application into focus.
Dual-Monitor Active Area Ratio
When mapping the tablet to a single monitor in a dual-screen setup, use the aspect ratio lock feature in the driver's Working Area tab. This prevents the tablet active area from being stretched or compressed, which can cause pen strokes to feel disproportionate on screen. Match the active area aspect ratio to your monitor's native resolution for best results.
Wireless Setup for Deco Pro Models
The Deco Pro MW/LW Gen 2 and Deco Mini 7W support wireless connection via a USB receiver or Bluetooth. For wireless via receiver, plug the receiver into your computer USB port and power on the tablet using the switch on its edge. For Bluetooth, hold the Bluetooth button on the tablet until it enters pairing mode, then pair from your computer's Bluetooth settings.
Latency benchmark: Independent testing published by RTINGS and community measurements by the digital art hardware community on Reddit show that modern Bluetooth 5.0 tablets introduce less than 10 milliseconds of additional latency compared to wired connection, which is imperceptible during normal drawing at brush-stroke speeds.
10. Who Needs a Graphic Tablet Setup Guide?
The following segments in India most frequently require detailed setup guidance, based on XPPen India support data.
- Download drivers from the official XPPen support page, not from the disc in the box.
- Always restart your computer after driver installation — this step is mandatory, not optional.
- On macOS Ventura and later, grant Accessibility and Security Extension permissions manually or the driver will not function.
- Enable Windows Ink in the driver settings before using Photoshop CC 2022 and later on Windows.
- Most issues (no detection, no pressure, cursor jitter) are resolved by a clean driver reinstall and a direct USB connection without hubs.
- Spend five minutes configuring express keys and the pressure curve after setup for an immediate improvement in your creative workflow.
11. Related Reading
12. Frequently Asked Questions
Why is my XPPen tablet not being detected after driver installation?
The most common causes are a USB hub issue, a stale previous driver, or a missing system restart. Try connecting the tablet directly to a USB port on your computer rather than through a hub. Fully uninstall the old driver using the driver's own uninstaller, restart the computer, then install the latest driver from the XPPen support page. If the issue persists, try a different USB cable.
How do I install the XPPen driver on Windows 11 in India?
Visit the XPPen India support page, search for your tablet model, download the latest Windows driver package, run the installer as Administrator, follow the on-screen prompts, and restart your computer when prompted. After restarting, connect your tablet via USB and the driver icon will appear in the system tray.
Why does my pen show no pressure sensitivity in Photoshop?
In Photoshop CC 2022 and later on Windows, you must enable Windows Ink in the XPPen driver settings. Open the driver, click on the pen icon, and ensure Windows Ink is toggled on. In Photoshop, go to Edit, then Preferences, then Technology Previews, and make sure Disable Native Canvas is not checked. Restart Photoshop after making these changes.
How do I set up an XPPen tablet on macOS Sequoia or Ventura?
Download the latest macOS driver from the XPPen support page. Run the installer and grant it Full Disk Access and Accessibility permissions under System Settings, Privacy and Security. On macOS Ventura and later, you may also need to approve the driver under Security Extensions. Restart your Mac after granting all permissions, then connect the tablet.
How do I map my tablet active area to only one monitor in a dual-screen setup?
Open the XPPen driver and navigate to the Working Area tab. You will see a monitor selection panel showing all connected displays. Click the monitor you want to map the tablet to and save the setting. The active area will now correspond only to that monitor, and your pen movement will be proportionally mapped to that display only.
Can I use my XPPen tablet on Android or iPad in India?
Several XPPen models support Android via USB OTG or Bluetooth. Connect the tablet to your Android device using a USB-C OTG cable or pair via Bluetooth, then open a compatible app like Autodesk Sketchbook or Infinite Painter. Check the specific product page for confirmed compatibility. For a wireless option, the Deco Mini 7W lists confirmed Android support.
How do I configure express keys on my XPPen tablet?
Open the XPPen driver from the system tray, click on the Keys tab or Express Keys section, and click any key to assign a function. You can assign keyboard shortcuts, mouse buttons, or software-specific commands. Changes save automatically. You can also create application-specific profiles so the express keys behave differently depending on which software is in focus.
My tablet cursor jumps around erratically. How do I fix this?
Erratic cursor movement is usually caused by electromagnetic interference from nearby devices, a dirty tablet surface, or a damaged nib. Try moving the tablet away from speakers, wireless charging pads, and other electronics. Clean the tablet surface with a dry microfibre cloth. If the problem persists, replace the nib using a replacement from the XPPen accessories range and retest.


