
Frequently Asked Question DMT
What are the different types of XP Pen tablets? How do I select a suitable one for myself?
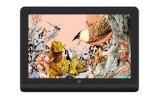
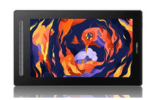
There are two broad product categories available for your understanding – Graphic tablets & Display Tablets. On display tablets, you can directly draw on the screen, the same way you draw on paper with a pen/pencil. Whereas on graphic tablets you draw on the tablet’s surface and your work appears on the connected computer screen.
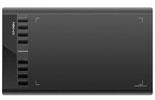
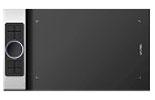
XP-Pen has 3 Series of Graphics Tablets – Star Series which is apt for beginners, Deco Series for the young professionals, and Deco Pro Series for the best-in-class professional experience. If you’re looking for the display tablets you should check out Artist Series Tablets.
What is pressure sensitivity? How is it helpful?
Pressure Sensitivity refers to the responsiveness of the stylus to the pressure of your stroke. The more pressure you apply, the darker will be the stroke. Higher the pressure sensitivity, better it is as it perfectly replicates a pen to paper feel.
The best available pressure sensitivity in tablets is 8192 Levels. We’re happy to share that all XP Pen tablets operate at the best-in-class 8192 levels of pressure sensitivity.
What is the warranty period?
All the XP-Pen tablets come with a 1-year replacement warranty for any kind of manufacturing defect.
Does XP Pen have a service centre in India?
Yes, we have service centers in Mumbai, Delhi, and Bangalore. If any customer faces any issue with the product, we have doorstep pickup facility across India.
How soon will the order be delivered if I order on the website?
Your orders are usually dispatched from the XP-Pen Warehouse within 2 working days and expected to be delivered anywhere between 3-5 working days from there (depends on courier serviceability – so there might be a delay at times). You will receive real-time tracking details for your order once it is ready for dispatch.
What are Tablet Express keys used for?
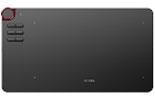
Shortcut keys / Express keys are basically the buttons available on the tablet that you can customize to perform a certain function like undo, zoom in, zoom out etc. Almost all our tablets come with customizable express keys. They improve workflows and increase user efficiency manifold.
What softwares will XP Pen tablets work with?
XP-Pen tablets are software neutral, meaning they work with pretty much all softwares out there (even as a replacement for your mouse).
XP-Pen are compatible with almost all majorly used design software (both 2D & 3D) including Photoshop, Illustrator, ClipStudio, Krita, ZBrush, Blender, ToonBoom etc.
XP-Pen tablets are also compatible with all the majorly used online teaching software like Zoom, Google Classroom, Microsoft Teams, WebEx, Microsoft Word, Powerpoint, Excel, OneNote, etc.
How to use XP Pen tablet for online teaching?
XP Pen tablets help create a progressive, interactive lecture, just like a traditional blackboard. The stylus allows you to hand-draw text, images, formulae and diagrams to create information-rich content. With an easy plug and play setup, XP Pen tablets require almost no technical expertise to use. Just follow the simple steps below:
1. Attach the tablet to a computer via USB/HDMI
2. Load the file/Software like Zoom, Google Classroom, Microsoft Teams, etc
3. Use the stylus to hover, write, click edit, etc
4. You can also share your screen and use the whiteboard function which allows you to write and draw effortlessly
What is the difference between Star 03 and Deco 01 V2?
Deco 01 V2 has features like Tilt Support and Android Compatibility which are not available in Star 03. Apart from features, Deco 01 V2 also comes with additional accessories like a scratch guard and glove. Star03 is a large size tablet available at a great price point, whereas the Deco01 offers great professional features.
What is the difference between Star G640S & Star G960?
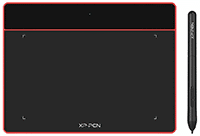
Star G960 has a bigger working area (9X6) than Star G640S (6X4) but doesn’t support Android phones which Star G640S does.
Which XP-Pen Tablets are compatible with Android Phones?
Star G640S, Deco 01 V2, Deco Pro Small & Deco Pro Medium.
How do I register my product for one month additional warranty?
Just head to https://xp-pen.co.in/register-product/, fill and all the details requested and submit the form. You’ll receive an email from the team about your registration. Star mark that email so you can share with us the same in the future if needed.
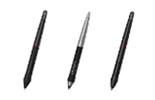
Can’t find extra nibs in Deco 01?
Twist the pen holder from the bottom and you’ll be able to see your additional nibs there.
How long does 1 nib last?
A single nib lasts about 200 to 400+ hours of regular usage. This number obviously can vary depending on your usage pattern and intensity.
How to install XP-Pen driver?
Head over to (New Drivers Link Here)
Select your product
As per your version of Mac/Windows/Linux, download the latest driver and install it. The entire process takes less than 2 minutes!
How to setup shortcut keys in Windows?
If you don’t see the icon there after plugging in your tablet, try double clicking the PenTablet icon on your desktop first and then check the system tray again. Opening the PenTablet settings from the desktop will always automatically minimize it to the system tray.
This is what your PenTablet Settings will look like:
From here you can click on “Express Keys Settings” to customize your tablet’s keys.
This is what your Express Keys window looks like, here you can configure all the Express Keys and the Scroll Wheel (if your tablet has one).
Depending on your tablet you will have more or less options here. Each selection represents an express key on your tablet.
Once you click on the drop down list that belongs to the key you want to configure you will have 3 options to choose from.
Open Tablet Settings: This is for when you want to set a certain key to open the PenTablet Settings each time you press it.
Run The Program: This is to set a key to open a certain program of you choosing when pressing it.
Function Key: This is where you can program any special command or a combination of key commands like Ctrl + Z (Undo) for example.
Once you click on Function Key, you will see a window like this:
You options for configuration are as follows:
Mouse Function:
Under here you can configure you keys to execute mouse functions like Left Click and Right Click as well as Scroll Up and Scroll Down, No Action will disable that express key.
Shortcuts:
This is where you can configure your keys to perform multiple key commands for Windows. To do it, you will need to first click on the Modifier you want to use (Ctrl, Alt, Shift or Win) then tap on your keyboard the other key to complete the command.
Example: to create the “Undo” command, you will first have to click on Ctrl as the first modifier and then tap the Z key on your keyboard.
Other:
Under other you can configure certain keys to do special commands.
● Open Tablet Settings will open the Driver Settings every time you press that key.
● Switch Monitor will allow you to toggle cursor control between your main monitor and your tablet or toggle cursor control between multiple monitors if you are not using a graphics tablet.
● Fine Detail Mode will lock in your whole tablet working area to a small area on your cursor’s location, this makes it easy in cases were you want to draw very meticulous art work.
● KL/KR Mode Switch, if you tablet has a scroll wheel, you have the option to program multiple commands on it this key will allow you to toggle between those configurations.
● [B]/[E] will simulate pressing the keyboard keys B and E one after the other. On most art programs, B is for Brush and E is for Eraser, this function is to be able to toggle between those tools.
To configure the Scroll Wheel(s) (some tablets have 2 scroll wheels) you will need to click on the “Dial” tab.
For functions you will have: No Action which disables the scroll wheel. Scroll, which defaults the wheel to scrolling, and Keyboard which allows you to customize any letter or command on the wheel.
This is the window will see when you press Keyboard. Under Name you can name the command you’re about to program. KL stands for “knob left” or counter-clockwise, and KR stands for “knob right” or clockwise. To program the knobs you just need to click on either of their type bars and do the keyboard command, these could be single letters like Z or M or it can also be multiple key combinations like Ctrl + Z.
Example: With this configuration, if you turn the knob clockwise (right) an art program could switch into Pan Mode and if you turn the knob counter-clockwise (left) it could open the Zoom Tool.
You can have multiple and different types of configurations on the Scroll Wheel.
Setting an Express Key to KL/KR Mode Switch will allow you to toggle between all configurations you have created for the Scroll Wheel.
Clicking Default will reset all express keys and scroll wheel configurations to factory defaults.
Every time you press an express key, the command or command name will appear on the bottom part of your screen. Checking Hide Help will disable that notification.
There is a way that you can have certain key commands for one program and different command keys for another without having to reconfigure your keys every time you switch between the apps.
By clicking on the plus (+) sign you will be able to add a program. You can customize certain keys to do certain commands on one program and do different commands on a different program.
You will see this window after pressing the plus (+) sign button. Under this list you can pick the program you want to add to the PenTablet Settings. If you don’t see the program you want, you can click on Browse to manually add it.
If you click on Browse you will see a Window like this, navigate to the .exe program you’d like to add and then click on Open
You can add as many programs as you like and customize different commands for both Express Keys and Scroll Wheel.
Back on the main PenTablet settings window you can customize the Pen Buttons but clicking on the drop down list of the desired button.The configuration of the Pen Buttons is the same as the Express Keys and Scroll Wheel.
You will have basic mouse functions, Run Program and Pen/Eraser toggle. The Pen/Eraser toggle may not work by default on some programs, so you will need to find out what is the key to toggle between erase and pen for that specific program and then customize it under Function Key.
How to setup shortcut keys in Mac?
This is what your Express Keys tab looks like, here you can configure all the Express Keys and the Scroll Wheel (if your tablet has one).
Clicking on the drop down list, you can select the express key you want to program and customize.
Depending on your tablet you will have more or less options here. Each selection represents an express key on your tablet.
Once you select the key you want to configure then you can click on the drop down list on the right.
This will give you a list of pre-made custom commands that you can use, but if you want to create or use your own commands, click on “Reset Customer Defined”
Once you click on Reset Customer Defined, you will then see a window like this:
Here is where you can create your own commands, All you need to do is press the keyboard key or keys combination of the command you want and it will be shown on the white rectangle. For example, here I pressed Cmd + A and you can see that it changed to that.
You can also name your commands too, by clicking here and typing the name you want. Once you are done click Ok and the key will be configured.
If you go back to the command drop down list, you will now see that your new command will be shown there.
To configure you scroll wheel, it’s pretty much the same. You need to select the wheel you want to configure (some tablets have 2 scroll wheels) then click on the drop down list to the right.
Once you click on the drop you list, you need to click on “Reset Customer Defined”
This is the window you will see, just like on the Express Keys once you are here you can press the keyboard key or keys for the command you want one each Scroll Wheel turn.
Left Hotkey is for when turning the scroll wheel counter-clockwise and Right Hotkey is for clockwise turning.
For example: you can set Left to Cmd + Z and Right to Cmd + O for zooming in and zooming out.
To configure the Pen Button keys, it’s also the same as the Express Keys and the Scroll Wheel. Open up your PenTablet Settings and on the Pen Tab you will see this:
You can click on either button that you want to customize and then select any of the commands already there.
Or you can click on “Reset Customer Defined” to create your own.
The configuration window is the same as with the Express Keys and the Scroll Wheel, all you gotta do is press the keyboard key or keys combination of the command you want, once you see it on the white rectangle you can then press Ok and exit out of that.
Below are the other options you have on the configuration window and a small explanation of what they do, you will see the same on Express Keys, Scroll Wheel and Pen Button configuration:
Application: Here you set a key or button to open an app each time you press that button or key. Just click on “Browse” and select the app you want.
HotKey: This is where you can press the keyboard keys to assign them to the key or button you are configuring.
Internet: Here you can set any website to be opened each time you press the button or key you are customizing.
Mouse: This part is so set any key or button to mouse commands like Right Click and Left Click.
Disable Pen Pressure: Checking this option will disable the pen pressure.
Disable Key Function: This option will disable all Express Keys commands until unchecked.
Disable Display Message: Every time you press an express key, the command or command name will appear on the bottom part of your screen. Checking this option will disable that message.
There is a way that you can have certain key commands for one program and different command keys for another program without having to reconfigure your keys every time you switch between the apps.
Under the Express Keys tab, you want to click on “Keyboard Set”
You will then see this window, the next thing you want to do is press on the plus (+) sign button and then select the application you want those keys to work with.
A window like this will pop here you can navigate your Mac until you find the application you want to use.
Once you have selected the app, you will notice that all the keys will be pre-configured for you, after this you can always go back to each key and reconfigure it to any other command you want.
You can configure both the Express Keys and the Scroll Wheel to work with specific keys on specific programs.
You can do this with multiple programs and applications, just click the plus (+) sign button to add more and you can configure them all individually.
How to use XP-Pen driver on Mac OS Mojave (10.14)
1. Please go to “Finder – Preferences – Sidebar“.
2. On the Sidebar tab, please make sure your Macintosh HD (Mac) Hard Disk is enabled.
Please visit the XP-Pen website (https://www.xp-pen.com/download/index) and download and install the most recent driver until complete.
3. Open “Launchpad” and find “PenTabletSetting”.
4. Open “System Preferences”, then “Security & Privacy“.
5. On the “Accessibility” setting, find “Unlock” first then click “PenTabletSetting” and “-” to delete it.
6. Click the “+” button.
7. Go to “Application” – “PenTablet” folder, then choose “PenTabletSetting” and “Open” button.
8. Click the “+” button.
9. Go to “Application” – “Macintosh HD (Mac)” – “Library” – “Application Support” – “PenTablet” folder, then choose “MsgDisplay“, “PenTabletDriverUX“, “UgeePenTabletInfo” and “Open” button.
10. Make sure “MsDisplay“, “PenTabletDriverUX“, “PenTabletSetting“, and “UgeePenTabletInfo” are both enabled.
11. Close “Security & Privacy”.
12. Reboot system and when system goes to the desktop, please open “PenTabletSetting” on Launchpad and set it to your XP-Pen product.
How to installed XP-Pen driver in Catalina (10.15)?
2. Go to “System Preferences – Security & Privacy”
3. On the Privacy tab, please delete all of tablet files on “Accessibility” & “Input Monitoring”.
4. Reboot your Mac.
5. When the computer Restarts, please go to the XP-Pen official website then download and install the newest Mac driver.
6. Go to “System Preferences – Security & Privacy”.
7. Once the Install is complete please go to “Finder” (The word in the top left corner of your screen) – “Preferences” – “Sidebar”.
8. On the “Sidebar” tab, please make sure the box next to your computers name is checked like in the image below.
9. Go to “System Preferences – Security & Privacy – Privacy – Accessibility”. Unlock “Click the lock to make changes.”
10. On the Accessibility tab, please enable “PenTabletSetting”.
11. Click “+” button then go to “Macintosh HD – Library – Application Support – Pen Tablet” folder then choice “PenTabletDriverUX” and click OK button.
12. Go to Input Monitor tab and please also enable “PenTabletSetting”.
13. Click “+” button then go to “Macintosh HD – Library – Application Support – Pen Tablet” folder then choice “PenTabletDriverUX” and click OK button. (If you get error message, please click “Quit Now” button.)
14. Reboot Mac and when the computer restarts, please open the PenTablet setting then check for pen pressure on the tablet?
Getting "Failed to import configuration" & "Save XML. failed" error message on driver?
1. Open ”Task Manager” then select “PenTablet” &“Pentablet Service(32bit)” click “End task” to close them.
2. Open “File Explorer” and go to “C:usersuser nameAppDataRoamingPentabletxml” folder, then delete “pentablet” files.
3. Reboot the computer. Once it has restarted please open the tablet settings and click the “OK” button to save the pentablet file again.
My stylus starts writing even when I'm just hovering.
After connecting the display tablet to my desktop/laptop, can't see the icons on my display that are present of the desktop
Go to the display settings of your laptop/PC, select multiple display and the duplicate display. Your entire desktop will be duplicated on the tablet.
Can I connect it with a projector?
My tablet is lagging in Photoshop. What should I do?
If you are using an XP-Pen product and are experiencing lag issues within Photoshop please try the following steps to solve it.
• Open Photoshop.
• Go to “Edit” – “Preferences” – “Performance”
• On the Performance tap. Please DISABLE “Use Graphics Processor” or “GPU”
• Click OK button to exit.
• Close PS then open it again.
How to use Photoshop pen pressure on Mac OS Mojave (10.14)
2. On the “Accessibility” setting, make sure “PenTabletDriver” and “PenTabletSetting” are both enabled.
3. Open the tablet setting and make sure you can test pen pressure with it.
4. If the pen pressure works, open PS.
5. If you get Accessibility Access (Events) error message, click “Open System Preferences” button.
6. On the “Security & Privacy” – “Accessibility” tab, click “Unlock” first, then “enable” Adobe Photoshop, and then close it.
7. Close PS on the Dock and open it again. Pen pressure will now work in Photoshop.
What are the different types of XP Pen tablets? How do I select a suitable one for myself?
There are two broad product categories available for your understanding – Graphic tablets & Display Tablets. On display tablets, you can directly draw on the screen, the same way you draw on paper with a pen/pencil. Whereas on graphic tablets you draw on the tablet’s surface and your work appears on the connected computer screen.
XP-Pen has 3 Series of Graphics Tablets – Star Series which is apt for beginners, Deco Series for the young professionals, and Deco Pro Series for the best-in-class professional experience. If you’re looking for the display tablets you should check out Artist Series Tablets.
What is pressure sensitivity? How is it helpful?
Pressure Sensitivity refers to the responsiveness of the stylus to the pressure of your stroke. The more pressure you apply, the darker will be the stroke. Higher the pressure sensitivity, better it is as it perfectly replicates a pen to paper feel.
The best available pressure sensitivity in tablets is 8192 Levels. We’re happy to share that all XP Pen tablets operate at the best-in-class 8192 levels of pressure sensitivity.
What is the warranty period?
All the XP-Pen tablets come with a 1-year replacement warranty for any kind of manufacturing defect.
Does XP Pen have a service centre in India?
Yes, we have service centres in Mumbai, Delhi and Bangalore. If any customer faces any issue with the product, we have doorstep pickup facility across India.
How soon will the order be delivered if I order on the website?
Your orders are usually dispatched from the XP-Pen Warehouse within 2 working days and expected to be delivered anywhere between 3-5 working days from there (depends on courier serviceability – so there might be a delay at times). You will receive real-time tracking details for your order once it is ready for dispatch.
What are Tablet Express keys used for?
Shortcut keys / Express keys are basically the buttons available on the tablet that you can customize to perform a certain function like undo, zoom in, zoom out etc. Almost all our tablets come with customizable express keys. They improve workflows and increase user efficiency manifold.
What softwares will XP Pen tablets work with?
XP-Pen are compatible with almost all majorly used design software (both 2D & 3D) including Photoshop, Illustrator, ClipStudio, Krita, ZBrush, Blender, ToonBoom etc.
XP-Pen tablets are also compatible with all the majorly used online teaching sofware like Zoom, Google Classroom, Microsoft Teams, WebEx, Micorosoft Word, Powerpoint, Excel, OneNote, etc.
How to use XP Pen tablet for online teaching?
1. Attach the tablet to a computer via USB/HDMI
2. Load the file/Software like Zoom, Google Classroom, Microsoft Teams etc
3. Use the stylus to hover, write, click edit etc
4. You can also share your screen and use the whiteboard function which allows your to write and draw effortlessly
What is the difference between Star 03 and Deco 01 V2?
What is the difference between Star G640S & Star G960?
Which XP-Pen Tablets are compatible with Android Phones?
How do I register my product for one month additional warranty?
Can’t find extra nibs in Deco 01?
How long does 1 nib last?
How to install XP-Pen driver?
Select your product
As per your version of Mac/Windows/Linux, download the latest driver and install it. The entire process takes less than 2 minutes!
How to setup shortcut keys in Windows?
If you don’t see the icon there after plugging in your tablet, try double clicking the PenTablet icon on your desktop first and then check the system tray again. Opening the PenTablet settings from the desktop will always automatically minimize it to the system tray.
This is what your PenTablet Settings will look like:
From here you can click on “Express Keys Settings” to customize your tablet’s keys.
This is what your Express Keys window looks like, here you can configure all the Express Keys and the Scroll Wheel (if your tablet has one).
Depending on your tablet you will have more or less options here. Each selection represents an express key on your tablet.
Once you click on the drop down list that belongs to the key you want to configure you will have 3 options to choose from.
Open Tablet Settings: This is for when you want to set a certain key to open the PenTablet Settings each time you press it.
Run The Program: This is to set a key to open a certain program of you choosing when pressing it.
Function Key: This is where you can program any special command or a combination of key commands like Ctrl + Z (Undo) for example.
Once you click on Function Key, you will see a window like this:
You options for configuration are as follows:
Mouse Function:
Under here you can configure you keys to execute mouse functions like Left Click and Right Click as well as Scroll Up and Scroll Down, No Action will disable that express key.
Shortcuts:
This is where you can configure your keys to perform multiple key commands for Windows. To do it, you will need to first click on the Modifier you want to use (Ctrl, Alt, Shift or Win) then tap on your keyboard the other key to complete the command.
Example: to create the “Undo” command, you will first have to click on Ctrl as the first modifier and then tap the Z key on your keyboard.
Other:
Under other you can configure certain keys to do special commands.
● Open Tablet Settings will open the Driver Settings every time you press that key.
● Switch Monitor will allow you to toggle cursor control between your main monitor and your tablet or toggle cursor control between multiple monitors if you are not using a graphics tablet.
● Fine Detail Mode will lock in your whole tablet working area to a small area on your cursor’s location, this makes it easy in cases were you want to draw very meticulous art work.
● KL/KR Mode Switch, if you tablet has a scroll wheel, you have the option to program multiple commands on it this key will allow you to toggle between those configurations.
● [B]/[E] will simulate pressing the keyboard keys B and E one after the other. On most art programs, B is for Brush and E is for Eraser, this function is to be able to toggle between those tools.
To configure the Scroll Wheel(s) (some tablets have 2 scroll wheels) you will need to click on the “Dial” tab.
For functions you will have: No Action which disables the scroll wheel. Scroll, which defaults the wheel to scrolling, and Keyboard which allows you to customize any letter or command on the wheel.
This is the window will see when you press Keyboard. Under Name you can name the command you’re about to program. KL stands for “knob left” or counter-clockwise, and KR stands for “knob right” or clockwise. To program the knobs you just need to click on either of their type bars and do the keyboard command, these could be single letters like Z or M or it can also be multiple key combinations like Ctrl + Z.
Example: With this configuration, if you turn the knob clockwise (right) an art program could switch into Pan Mode and if you turn the knob counter-clockwise (left) it could open the Zoom Tool.
You can have multiple and different types of configurations on the Scroll Wheel.
Setting an Express Key to KL/KR Mode Switch will allow you to toggle between all configurations you have created for the Scroll Wheel.
Clicking Default will reset all express keys and scroll wheel configurations to factory defaults.
Every time you press an express key, the command or command name will appear on the bottom part of your screen. Checking Hide Help will disable that notification.
There is a way that you can have certain key commands for one program and different command keys for another without having to reconfigure your keys every time you switch between the apps.
By clicking on the plus (+) sign you will be able to add a program. You can customize certain keys to do certain commands on one program and do different commands on a different program.
You will see this window after pressing the plus (+) sign button. Under this list you can pick the program you want to add to the PenTablet Settings. If you don’t see the program you want, you can click on Browse to manually add it.
If you click on Browse you will see a Window like this, navigate to the .exe program you’d like to add and then click on Open
You can add as many programs as you like and customize different commands for both Express Keys and Scroll Wheel.
Back on the main PenTablet settings window you can customize the Pen Buttons but clicking on the drop down list of the desired button.The configuration of the Pen Buttons is the same as the Express Keys and Scroll Wheel.
You will have basic mouse functions, Run Program and Pen/Eraser toggle. The Pen/Eraser toggle may not work by default on some programs, so you will need to find out what is the key to toggle between erase and pen for that specific program and then customize it under Function Key.
How to setup shortcut keys in Mac?
This is what your Express Keys tab looks like, here you can configure all the Express Keys and the Scroll Wheel (if your tablet has one).
Clicking on the drop down list, you can select the express key you want to program and customize.
Depending on your tablet you will have more or less options here. Each selection represents an express key on your tablet.
Once you select the key you want to configure then you can click on the drop down list on the right.
This will give you a list of pre-made custom commands that you can use, but if you want to create or use your own commands, click on “Reset Customer Defined”
Once you click on Reset Customer Defined, you will then see a window like this:
Here is where you can create your own commands, All you need to do is press the keyboard key or keys combination of the command you want and it will be shown on the white rectangle. For example, here I pressed Cmd + A and you can see that it changed to that.
You can also name your commands too, by clicking here and typing the name you want. Once you are done click Ok and the key will be configured.
If you go back to the command drop down list, you will now see that your new command will be shown there.
To configure you scroll wheel, it’s pretty much the same. You need to select the wheel you want to configure (some tablets have 2 scroll wheels) then click on the drop down list to the right.
Once you click on the drop you list, you need to click on “Reset Customer Defined”
This is the window you will see, just like on the Express Keys once you are here you can press the keyboard key or keys for the command you want one each Scroll Wheel turn.
Left Hotkey is for when turning the scroll wheel counter-clockwise and Right Hotkey is for clockwise turning.
For example: you can set Left to Cmd + Z and Right to Cmd + O for zooming in and zooming out.
To configure the Pen Button keys, it’s also the same as the Express Keys and the Scroll Wheel. Open up your PenTablet Settings and on the Pen Tab you will see this:
You can click on either button that you want to customize and then select any of the commands already there.
Or you can click on “Reset Customer Defined” to create your own.
The configuration window is the same as with the Express Keys and the Scroll Wheel, all you gotta do is press the keyboard key or keys combination of the command you want, once you see it on the white rectangle you can then press Ok and exit out of that.
Below are the other options you have on the configuration window and a small explanation of what they do, you will see the same on Express Keys, Scroll Wheel and Pen Button configuration:
Application: Here you set a key or button to open an app each time you press that button or key. Just click on “Browse” and select the app you want.
HotKey: This is where you can press the keyboard keys to assign them to the key or button you are configuring.
Internet: Here you can set any website to be opened each time you press the button or key you are customizing.
Mouse: This part is so set any key or button to mouse commands like Right Click and Left Click.
Disable Pen Pressure: Checking this option will disable the pen pressure.
Disable Key Function: This option will disable all Express Keys commands until unchecked.
Disable Display Message: Every time you press an express key, the command or command name will appear on the bottom part of your screen. Checking this option will disable that message.
There is a way that you can have certain key commands for one program and different command keys for another program without having to reconfigure your keys every time you switch between the apps.
Under the Express Keys tab, you want to click on “Keyboard Set”
You will then see this window, the next thing you want to do is press on the plus (+) sign button and then select the application you want those keys to work with.
A window like this will pop here you can navigate your Mac until you find the application you want to use.
Once you have selected the app, you will notice that all the keys will be pre-configured for you, after this you can always go back to each key and reconfigure it to any other command you want.
You can configure both the Express Keys and the Scroll Wheel to work with specific keys on specific programs.
You can do this with multiple programs and applications, just click the plus (+) sign button to add more and you can configure them all individually.
How to use XP-Pen driver on Mac OS Mojave (10.14)
1. Please go to “Finder – Preferences – Sidebar“.
2. On the Sidebar tab, please make sure your Macintosh HD (Mac) Hard Disk is enabled.
Please visit the XP-Pen website (https://www.xp-pen.com/download/index) and download and install the most recent driver until complete.
3. Open “Launchpad” and find “PenTabletSetting”.
4. Open “System Preferences”, then “Security & Privacy“.
5. On the “Accessibility” setting, find “Unlock” first then click “PenTabletSetting” and “-” to delete it.
6. Click the “+” button.
7. Go to “Application” – “PenTablet” folder, then choose “PenTabletSetting” and “Open” button.
8. Click the “+” button.
9. Go to “Application” – “Macintosh HD (Mac)” – “Library” – “Application Support” – “PenTablet” folder, then choose “MsgDisplay“, “PenTabletDriverUX“, “UgeePenTabletInfo” and “Open” button.
10. Make sure “MsDisplay“, “PenTabletDriverUX“, “PenTabletSetting“, and “UgeePenTabletInfo” are both enabled.
11. Close “Security & Privacy”.
12. Reboot system and when system goes to the desktop, please open “PenTabletSetting” on Launchpad and set it to your XP-Pen product.
How to installed XP-Pen driver in Catalina (10.15)?
2. Go to “System Preferences – Security & Privacy”
3. On the Privacy tab, please delete all of tablet files on “Accessibility” & “Input Monitoring”.
4. Reboot your Mac.
5. When the computer Restarts, please go to the XP-Pen official website then download and install the newest Mac driver.
6. Go to “System Preferences – Security & Privacy”.
7. Once the Install is complete please go to “Finder” (The word in the top left corner of your screen) – “Preferences” – “Sidebar”.
8. On the “Sidebar” tab, please make sure the box next to your computers name is checked like in the image below.
9. Go to “System Preferences – Security & Privacy – Privacy – Accessibility”. Unlock “Click the lock to make changes.”
10. On the Accessibility tab, please enable “PenTabletSetting”.
11. Click “+” button then go to “Macintosh HD – Library – Application Support – Pen Tablet” folder then choice “PenTabletDriverUX” and click OK button.
12. Go to Input Monitor tab and please also enable “PenTabletSetting”.
13. Click “+” button then go to “Macintosh HD – Library – Application Support – Pen Tablet” folder then choice “PenTabletDriverUX” and click OK button. (If you get error message, please click “Quit Now” button.)
14. Reboot Mac and when the computer restarts, please open the PenTablet setting then check for pen pressure on the tablet?
Getting "Failed to import configuration" & "Save XML. failed" error message on driver?
1. Open ”Task Manager” then select “PenTablet” &“Pentablet Service(32bit)” click “End task” to close them.
2. Open “File Explorer” and go to “C:usersuser nameAppDataRoamingPentabletxml” folder, then delete “pentablet” files.
3. Reboot the computer. Once it has restarted please open the tablet settings and click the “OK” button to save the pentablet file again.
My stylus starts writing even when I'm just hovering.
After connecting the display tablet to my desktop/laptop, can't see the icons on my display that are present of the desktop
Go to the display settings of your laptop/PC, select multiple display and the duplicate display. Your entire desktop will be duplicated on the tablet.
Can I connect it with a projector?
My tablet is lagging in Photoshop. What should I do?
If you are using an XP-Pen product and are experiencing lag issues within Photoshop please try the following steps to solve it.
• Open Photoshop.
• Go to “Edit” – “Preferences” – “Performance”
• On the Performance tap. Please DISABLE “Use Graphics Processor” or “GPU”
• Click OK button to exit.
• Close PS then open it again.
How to use Photoshop pen pressure on Mac OS Mojave (10.14)
2. On the “Accessibility” setting, make sure “PenTabletDriver” and “PenTabletSetting” are both enabled.
3. Open the tablet setting and make sure you can test pen pressure with it.
4. If the pen pressure works, open PS.
5. If you get Accessibility Access (Events) error message, click “Open System Preferences” button.
6. On the “Security & Privacy” – “Accessibility” tab, click “Unlock” first, then “enable” Adobe Photoshop, and then close it.
7. Close PS on the Dock and open it again. Pen pressure will now work in Photoshop.