Step by Step Guide to 3-Point Perspective Drawing

3-point perspective drawing is a fundamental technique used by artists to create realistic and dynamic images.
Whether you're an aspiring artist or simply interested in learning more about perspective drawing, this step-by-step guide will provide you with the knowledge and tools you need to get started.
In this article, we will cover the basics of 3 point perspective drawing, the tools needed, setting up your drawing, drawing the vertical line and creating the box, and adding and refining details.
Understanding the Basics of 3 Point Perspective Drawing

Before diving into the specifics of 3 point perspective drawing, it's important to understand what exactly it is and why it is important in the realm of art.
When it comes to creating art, perspective plays a crucial role in making the artwork look realistic and 3-dimensional.
It is the technique that allows artists to accurately represent objects and environments as they appear in the real world. Without perspective, drawings would appear flat and lacking depth.
What is 3 Point Perspective Drawing?

3-point perspective drawing is a method that takes perspective to the next level.
While one-point perspective uses a single vanishing point to create the illusion of depth, 3-point perspective introduces two additional vanishing points, resulting in a more dynamic and realistic representation.
This technique is particularly useful when drawing scenes with tall buildings, towering structures, or complex architectural designs.
In 3-point perspective, the three vanishing points are typically located on the horizon line. The horizon line represents the viewer's eye level and serves as a reference point for determining the placement of objects and their vanishing points.
By strategically placing these vanishing points, artists can accurately depict the way objects recede into the distance.
The Importance of Perspective in Art
Perspective is a fundamental concept in art that helps create a sense of depth and realism in an artwork.
Understanding perspective allows artists to accurately represent objects and environments, adding believability and visual interest to their creations.
Whether you're drawing landscapes, cityscapes, or still life, mastering perspective will greatly enhance your ability to capture the essence of what you see.
By incorporating perspective into your drawings, you can create the illusion of distance, making objects appear closer or farther away.
This technique adds depth and dimension to your artwork, making it more engaging and realistic. Perspective also allows you to accurately depict the proportions and scale of objects, ensuring that they look true to life.
Furthermore, perspective can be used to create a sense of movement and dynamic composition.
By manipulating the vanishing points and the lines that converge towards them, artists can guide the viewer's eye through the artwork, creating a sense of depth and leading them to focal points of interest.
Mastering perspective drawing takes practice and a keen eye for observation. It involves understanding the principles of foreshortening, horizon lines, vanishing points, and the way objects diminish in size as they recede into the distance.
By studying and applying these principles, artists can elevate their artwork to new levels of realism and visual impact.
Tools Needed for 3 Point Perspective Drawing

Before embarking on your journey into the world of 3 point perspective drawing, it's important to gather the necessary tools and prepare your workspace.
When it comes to drawing tools, there are countless options to choose from. Whether you prefer traditional pencil and paper or digital drawing tablets, the key is to find the tools that you feel most comfortable and confident using. Experiment with different tools and mediums to discover what works best for you.
If you choose to go the traditional route, a good quality set of drawing pencils is a must-have. Look for pencils with a range of hardness, from soft (B) to hard (H), as this will allow you to achieve a variety of line weights and textures in your drawings. Additionally, a good eraser is essential for making corrections and refining your work.
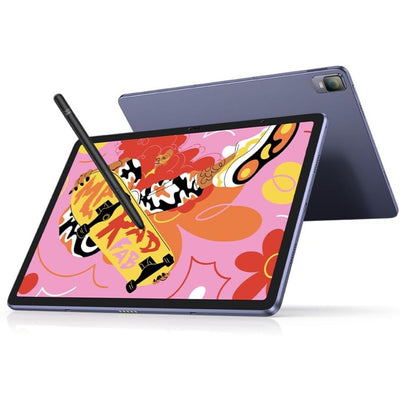
For those who prefer digital drawing, investing in a graphics tablet can greatly enhance your 3 point perspective drawing experience.
These tablets allow you to draw directly onto the screen, giving you more control and precision. There are many options available, so be sure to do your research and choose one that fits your needs and budget.
Preparing your workspace is crucial to ensure a productive and comfortable drawing experience. Find a quiet and well-lit area where you can focus without distractions.
Natural light is ideal, as it provides a more accurate representation of colors. If natural light is not available, consider using a daylight lamp to simulate natural lighting conditions.
In addition to lighting, the cleanliness of your drawing surface is also important. Make sure to clean your drawing board or table before starting a new project.
Remove any dust or debris that may interfere with your drawing process. A clean surface will not only improve the quality of your work but also prevent any unwanted smudges or marks.
Consider using a drawing board or easel to achieve an ergonomic drawing position. This will help prevent strain and discomfort during long drawing sessions.
A drawing board allows you to adjust the angle of your drawing surface, ensuring that you have a clear view of your work at all times. An easel, on the other hand, provides a more upright position, which can be beneficial for those who prefer to stand while drawing.
Now that you have gathered your drawing tools and prepared your workspace, you are ready to dive into the world of 3 point perspective drawing. Remember to practice regularly and have fun exploring the endless possibilities this technique has to offer!
Also learn how draw in 2 point Perspective
Setting Up Your Drawing
Now that you have your tools and workspace ready, it's time to set up your drawing for the 3 point perspective technique.
Before we dive into the details of setting up your drawing, let's take a moment to appreciate the beauty and complexity of perspective drawing.
Perspective drawing is a powerful tool that allows artists to create realistic and immersive artworks.
By understanding the principles of perspective, you can bring depth and dimension to your drawings, making them come alive on the page.
So, let's get started!
- Establishing the Horizon Line
The horizon line is a crucial element in perspective drawing as it represents the viewer's eye level. To establish the horizon line, simply draw a straight line across your paper.
This line will serve as a reference point for placing objects and determining the height and angle of your vanishing points.
Now, imagine yourself standing in an open field, surrounded by vast landscapes.
As you gaze into the distance, the horizon line stretches out before you, creating a sense of infinite possibilities. This is the same feeling we want to capture in our drawings.
Take a moment to observe the world around you. Notice how objects in the distance appear smaller and closer together, while those closer to you appear larger and more detailed. This is the magic of perspective at work.
- Identifying the Vanishing Points
The vanishing points are the points where parallel lines appear to converge in the distance.
In three-point perspective, there are two vanishing points on the horizon line and one above or below it. Use your imagination to visualize where these vanishing points might be, keeping in mind that they should be evenly spaced.
Imagine yourself standing in a bustling city, surrounded by towering skyscrapers. As you look up at the buildings, you notice how the vertical lines of the buildings seem to converge towards a point high above you. This is the third vanishing point, which adds an extra level of depth and realism to your drawings.
Now, let's take a moment to appreciate the power of vanishing points. They are like the hidden threads that hold the fabric of your drawing together, guiding your lines and shapes towards a unified composition.
By understanding the concept of vanishing points, you can create drawings that are not only visually stunning but also structurally sound.
So, take a deep breath and let your imagination soar as you envision the possibilities that lie within the realm of perspective drawing.
Drawing the Vertical Line and Creating the Box
With the horizon line and vanishing points in place, it's time to draw the vertical line and create the foundation for your 3 point perspective drawing.
Before we delve into the technical aspects of drawing the vertical line, let's take a moment to appreciate the significance of this step. The vertical line is like the backbone of your drawing, providing structure and dimension to your artwork.
It acts as a reference point for the height and scale of the objects you will be drawing.
- Role of the Vertical Line
The vertical line plays a crucial role in creating the illusion of depth in your artwork. By drawing a straight line perpendicular to the horizon line from a point on the horizon line, you are essentially establishing the front edge of your objects.
This line gives your objects depth and volume, making them appear more realistic and three-dimensional.
Imagine standing in front of a tall building. The vertical line represents the front edge of that building, extending from the ground all the way up to the sky.
It serves as a visual anchor, allowing you to accurately depict the height and proportions of the objects in your drawing.
- Constructing the Box
Now that you have a clear understanding of the role of the vertical line, it's time to move on to the next step: constructing the box. This box will serve as the framework for your drawing, providing a solid foundation upon which you can build your scene.
To create the box, you will connect the top and bottom points of the vertical line to the vanishing points on the horizon line. This step is crucial in establishing the perspective and guiding the placement of objects within your drawing.
Imagine the box as a transparent structure that encapsulates the objects within your scene. It acts as a guide, helping you determine the size, position, and orientation of the various elements in your artwork.
By carefully constructing this box, you are setting the stage for a visually compelling and accurate representation of your subject matter.
Keep in mind that the box doesn't have to be a literal box shape. It can take various forms depending on the objects you are drawing.
For example,
if you are drawing a cityscape, the box might represent the outline of a skyscraper or a cluster of buildings. The key is to use the box as a tool to establish perspective and create a sense of depth in your artwork.
Adding & Refining Details

With the basic structure in place, it's time to add depth, dimension, and intricate details to your 3 point perspective drawing.
- Drawing Inside the Box
Now that you have your box, you can start drawing objects within the scene. Use the edges of the box as guides for placing objects in proper perspective.
Pay attention to the size and scale of objects as they move closer to or farther away from the viewer.
- Perfecting Your Lines and Angles
As you continue to add details to your drawing, strive for clean and precise lines.
Pay close attention to the angles and proportions of objects, ensuring they align with the perspective established by the vanishing points. Take your time and make any necessary adjustments to achieve the desired effect.
By following this step-by-step guide, you are well on your way to mastering the art of 3 point perspective drawing.
Remember to practice regularly and experiment with different subjects and compositions. The more you explore and challenge yourself, the more proficient you will become.
So grab your drawing tools and embark on your artistic journey in the fascinating world of 3 point perspective drawing!
Now you know 3 point perspective drawing, it is also critical to know the Difference between Aerial & Linear Perspective.


